DataSelf ETL
Help
Importing Data from Excel
Feature added in ETL version 2013.2
Revision: Feb 17, 2014
DataSelf ETL version 2013.2.xxx
Introduction
Guide to importing data from Microsoft Excel files. Imported data may be combined with other data in DataSelf’s data warehouse.
How to Search this Guide
Type Ctrl-F and enter your search terms in the Find window.
HOW TO Topics -- Import from Excel files
|
How do I . . . ? |
Do this or Refer to |
|
|
|
||
|
Quick guide to preparing the data in Excel for import, connecting DataSelf ETL to the Excel file, and importing the data. |
|
|
|
Click Action > Wizard >
|
|
|
|
Click Action > Wizard >
|
|
|
|
Select a table on the
|
|
|
|
|
|
|
|
Add or remove columns/fields in a table |
1. Click on the table’s name in
|
|
|
Delete a table |
1.
Click on the table’s name on the
|
|
|
Rename a column/field |
See instructions at
|
|
|
Rename a table |
See instructions at
|
|
Elements of a Microsoft Excel File
|
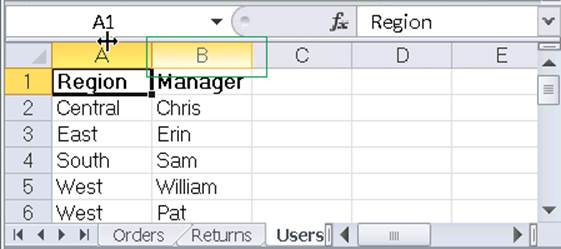
Excel Workbook – the entire Excel file Worksheet – a ‘tab’ within the workbook. Table – a block of data within a workbook.
Figure 1. "Users" worksheet shown in a close-up of a Excel screen. How Excel concepts relate to DataSelf ETL: · ETL Data Source – the ETL’s connection to a Excel Workbook / Excel file. · ETL Table – holds the data imported from a worksheet in a Excel workbook. |
Import from Excel: Outline
|
Preparing, Importing, and Verifying Data Imported from Excel |
|
|
1. Prepare
data in Excel. |
· Copy data to a new worksheet (optional). · Insert the data into a named table (Recommended). · Remove blank rows and columns. · Remove all headings except 1 row of column headings. · Remove all other data and text outside of the table. ·
Make sure that the cells in the first row of data are not
blank. · Fix blank cells within the table. Software Used: Microsoft Excel |
|
2. Setup
folders & procedures for Excel files in server. |
· Establish procedures to maintain the data in the Excel workbooks. · Consider adding a data-last-updated date column. Software Used: Windows Server |
|
Software Used: DataSelf ETL – Import Table Wizard |
|
|
Software Used: DataSelf ETL – Import Table Wizard |
|
|
5. Examine and Change data types as required.
|
DataSelf ETL: Browse Table > Modify Structure > Change Field Models Although the browse table records window may display data in a column this display is misleading. Tables containing one or more columns with a “M” format cannot be properly processed. |
|
6. Validate data |
· Watch for cells with blank or zero dates · Watch for cells with blank dates Software Used: DataSelf ETL – Browse Table window |
|
7. Add to
Refresh Batch |
· Batch & scheduling strategies · Manual or scheduled refresh (.bat files for manual refresh?) Software Used: DataSelf ETL – Refresh Batch Wizard |
Add a Excel Data Connection
|
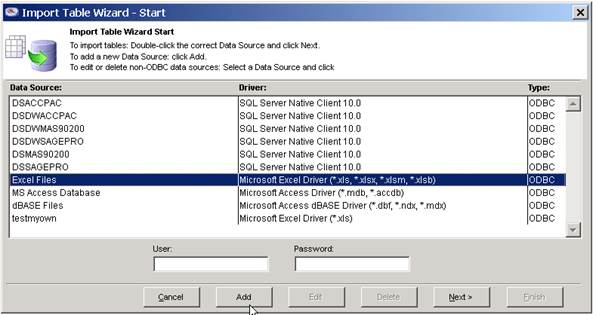
1. Action
> Wizard > |
|
|
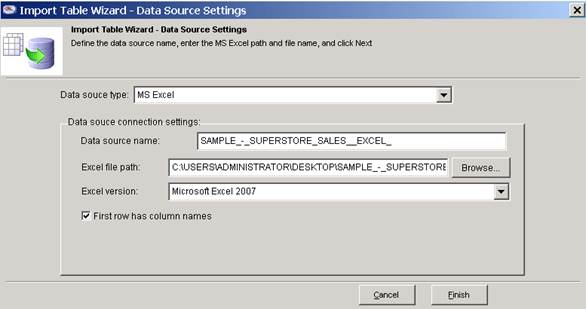
2. Select Excel Files in the Data Source column. 3. Click Add. |
|
|
4. Click Browse. 5. Select the Excel workbook file name in the Select Excel files window and click OK. |
|
|
6. Modify the Data Source name as desired. 7. Click Finish.
|
|
|
8. Click Cancel |
|

Add a Excel Data Connection continued – Import Table
|
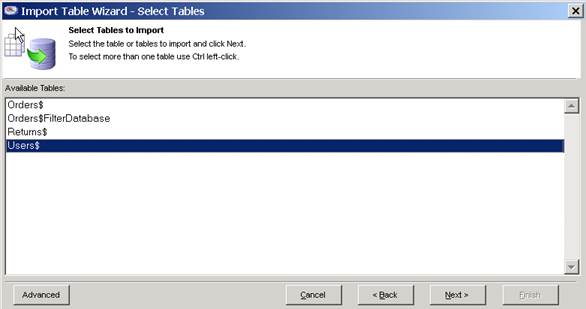
1. Select the name of the Excel worksheet to import. 2. Click Next. |
|
|
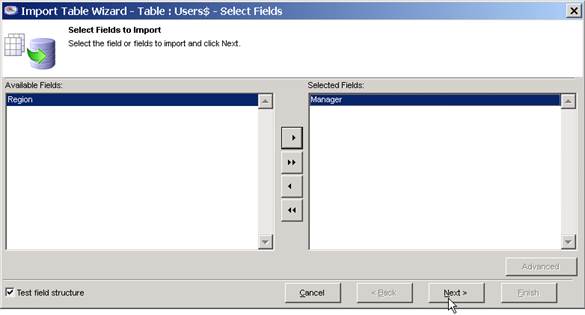
3. Select
the fields to import and copy them to the Selected Fields column using the 4. Click Next. |
|
|
5. Click Next. |
Recommendation: Skip the Import Table Wizard – Table: … Optional: Select Data Grouping window until the data has been successfully imported and verified. The grouping setting may be changed later. |
|
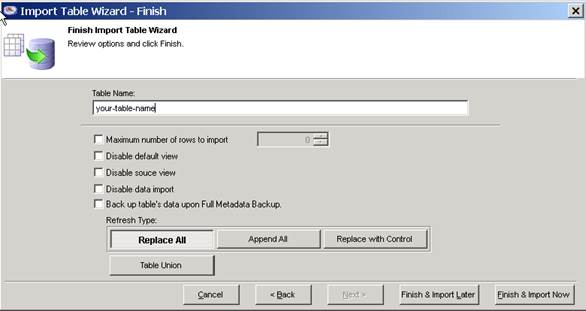
6. Enter a name in Table Name. 7. Click Finish & Import Later. |
|
|
NOTES: · Fields with M format detected warning. Data types on one or more columns of data will have to be changed. See
|
|

Add a Table with Data Imported from Excel
|
1. Click Action > Wizard
> |
|
|
2. Select the Data Source name for the connection to the Excel file. 3. Click Next. |
|
|
4. Continue with the instructions at Add a Excel Data Connection continued –Import Table |
|
|
NOTES: · In ETL terms a data connection to a Excel file is also called a “data source”. · These instructions assume a data connection to the requisite Excel file already has been created. See Add a Data Connection to an Excel File . |
|
Change a Table with Data Imported from Excel (prior to 2013.4)
|
1.
Select a table on the |
|
|
2. Click Next. |
|
|
3. Select
the fields to import and copy them to the Selected
Fields column using the 4. Click Next. |
|
|
5. Select
the fields to use for grouping and copy them to the Grouping Fields column using the 6. Click Next. |
|
|
7. Enter a name in Table Name. 8. Set Refresh Type options as desired. 9. Click Finish & Import Later. |
|
|
NOTES: · Only worksheets in the currently connected Excel file may be imported. |
|

Examine the Data Types in a Table
Although the browse table records window may display data in a column this display is misleading. Tables containing one or more columns with a “M” format cannot be properly processed.
|
“M” Format Fields Imported fields with “M” formats can be made usable in two ways: • Reference the “M” format field in a Formula. (Formula Wizard). • Change the “M” format field to a different field model. See Change_Data_Types. |
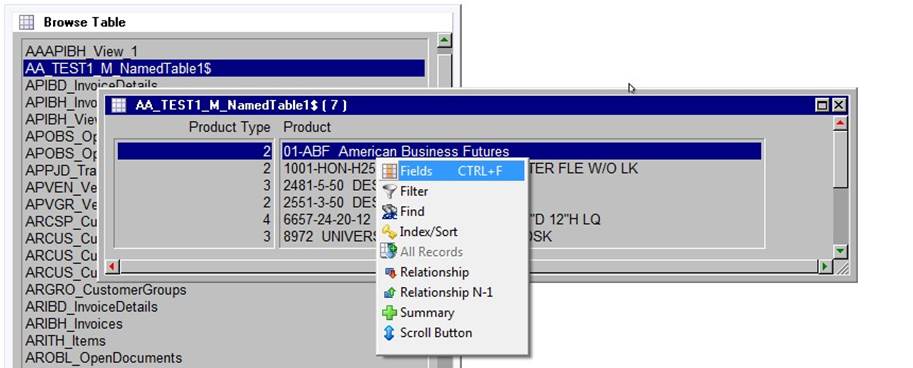
1. Double-click on the name of the new table in the Browse Table window.
2.
Right-click on a data column in the browse table records window and
click Fields.
3.
Examine the Field Format column names
in the Fields window.
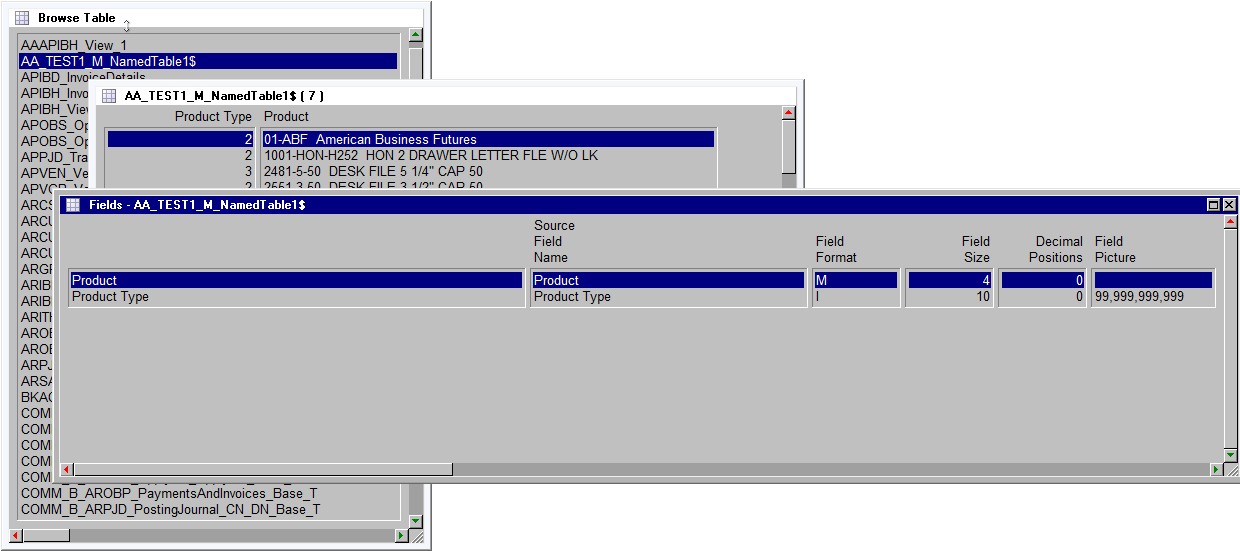
4. Make a note of all rows where the Field Format is = “M”.
5. Close the Fields and browse table record windows.
Change Data Types (prior to 2013.4)
Data Types are also called “field types” in the ETL.
|
1. Select the table in the Browse Table window. |
|
|
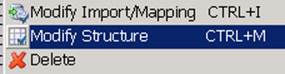
2. Right-click and select Modify Structure. |
|
|
3. Click on the data in a column. |
|
|
4. Double-click on a row |
|
|
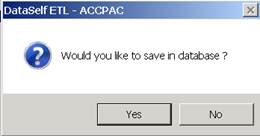
5. Click Yes.
|
|
|
6. Close the Change Field Models and browse table records windows.
|
|
|
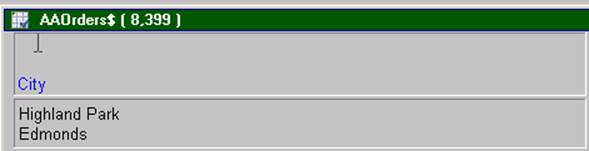
NOTES: ·
If you click on the column header the window will display the
column as shown below. Press the Esc key to clear. |
|